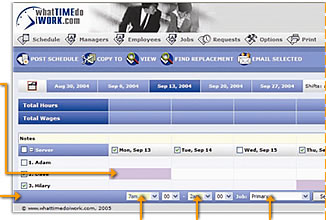
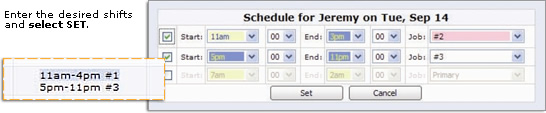
| To add multiple shifts within a single day for an employee, double-click on the desired cell to open the multiple shifts window. |
 |
| |
 |
 |
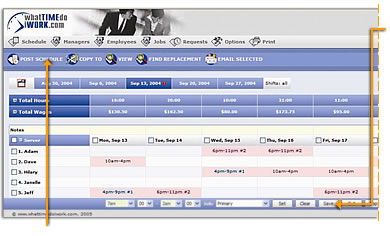
Post:
Post the schedule for the employees to see. |
|
|
 |
Save:
Save your changes. |
|
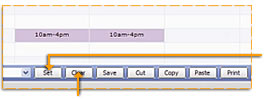
| Once you have created all the desired shifts, select the SAVE button to save your changes to the schedule. The system will take a few moments to reload the screen. |
| Once the schedule has reloaded, you will notice that the cell(s) you have changed now appear pink. |
|
| These are all changes to the schedule that have not been posted yet.You can continue to work on any schedule, until you are ready to post your changes for the employees to see. |
|
|
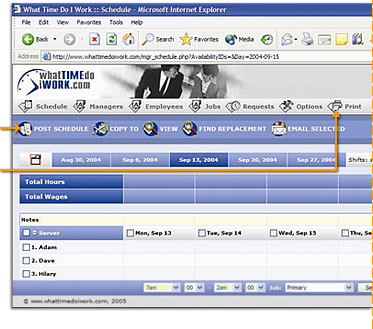
| When you are ready to allow the employees to see the new schedule, select the POST SCHEDULE button at the top left of the screen.This will update the employee’s side of the system while sending messages to their cell phones & emails. |
 |
|
 |
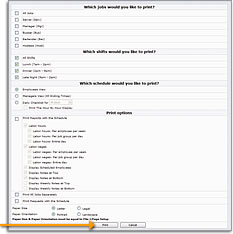
Print:
Print your schedule. |
|
At the top of the SCHEDULE screen in the grey bar, select PRINT. This will open the print window to allow you to customize your print.
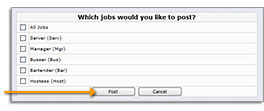
Start by selecting the jobs that you would like to print. For a Weekly View proceed to the bottom of the window and select the PRINT button.The system will display a printer friendly version of the Weekly View, and the system will open your printer’s window.
Now just select PRINT from your printer’s window.For a Daily View, about half way down you will see “Which Schedule would you like to Print?”.
Select the DAILY CHECKLIST and the desired day.Now proceed to the bottom of the window and select PRINT. |
|
 |
|
|